Vineyard soil analysis: what to test, when, and what to do with the results
TL;DR
- Vineyard soil analysis tells you pH, organic matter, macro and micronutrient levels, and physical texture before you plant or fertilize.
- A basic panel costs $20 to $80 per sample at most land-grant labs.
- Test every 2 to 3 years for established blocks, and before any new planting.
- The single most important number is pH: grapevines do best between 5.5 and 7.0.
Why soil analysis matters before you touch a vineyard
Every fertilizer and amendment decision you make either fixes a problem the soil already has or creates one it didn't. That's it. Soil analysis is how you find out which situation you're in.
Grapevines are long-lived perennials. A block planted today will probably still be producing in 25 years. A pH correction you skip in year one can lock in chronic nutrient deficiencies for a decade, and a potassium imbalance you miss now can quietly raise juice potassium and tank your wine's acid balance years later. None of that shows up on the surface until you've already lost money.
For a new planting, there's no substitute for pre-plant analysis. You can lime or sulfur a field before you install trellis, run irrigation, and put vines in the ground. You can't do that economically afterward. WSU Extension is blunt about this: corrective lime applied to established vineyards moves slowly through the soil profile, often taking 2 to 3 years to reach the rootzone, compared with deep tillage incorporation before planting [1].
For established blocks, regular soil analysis catches drift. Repeated nitrogen applications acidify soil over time. Heavy potassium programs can suppress magnesium uptake. Annual testing is overkill and wastes money. Every two to three years for producing blocks, every year if you're actively amending and tracking a problem, is where most extension programs land.
What does a vineyard soil test actually measure?
A standard agronomic panel from a land-grant university lab or a commercial lab reports these categories:
pH and buffer pH. Soil pH is the master variable. It controls the availability of nearly every nutrient. Buffer pH (sometimes called SMP buffer) is a separate reading that tells the lab how much lime is needed to hit a target pH, because different soils resist change differently. For vineyard situations, always request buffer pH if your soil pH is below 6.0.
Macronutrients: phosphorus, potassium, calcium, magnesium. These come back as parts per million (ppm) or pounds per acre equivalents. The ratio between calcium and magnesium matters as much as the raw numbers. A soil with adequate magnesium in absolute terms but a calcium-to-magnesium ratio above 10:1 will often show magnesium deficiency symptoms in the vines anyway [2].
Organic matter. Expressed as a percentage. Most vineyard soils run 0.5% to 3%. Organic matter affects water-holding capacity, cation exchange capacity (CEC), and microbial activity. Very low organic matter (under 1%) in a sandy soil is a different problem than 0.8% in a heavy clay.
Micronutrients. A full panel adds boron, zinc, manganese, iron, and copper. These aren't always in the base panel. Ask for them, especially if you're on high-pH soils where iron and manganese become less available, or on old orchard ground that may carry legacy copper from decades of fungicide programs.
Cation exchange capacity (CEC). CEC tells you how well the soil holds nutrient cations. Sandy soils have low CEC (2 to 5 meq/100g); heavy clays and organic-matter-rich soils run higher (20 to 40 meq/100g). A low-CEC soil loses potassium to leaching much faster and needs smaller, more frequent applications.
Texture and physical properties. Basic soil texture (sand, silt, clay percentages) usually requires a separate particle-size analysis. It isn't always part of a standard fertility panel, but it's worth doing once for each distinctly different soil type in your vineyard. Texture drives drainage, rootzone depth, and vine vigor more than almost any fertility number.
Some labs also offer nitrate-nitrogen analysis, useful in irrigated settings where nitrogen management is tight. Soil nitrogen is less predictive for vines than for annual crops, though, because most nitrogen decisions in vineyards come from petiole tissue analysis rather than soil tests alone.
What are the ideal soil parameters for vineyards?
Here's the honest version: there is no single ideal soil. Some of the world's most famous wines come from thin, rocky, nutrient-poor ground that any agronomist would call marginal. What matters is understanding your soil well enough to manage it, not matching a textbook ideal.
That said, there are ranges where vines thrive without constant intervention and ranges where they struggle unless you're on top of them.
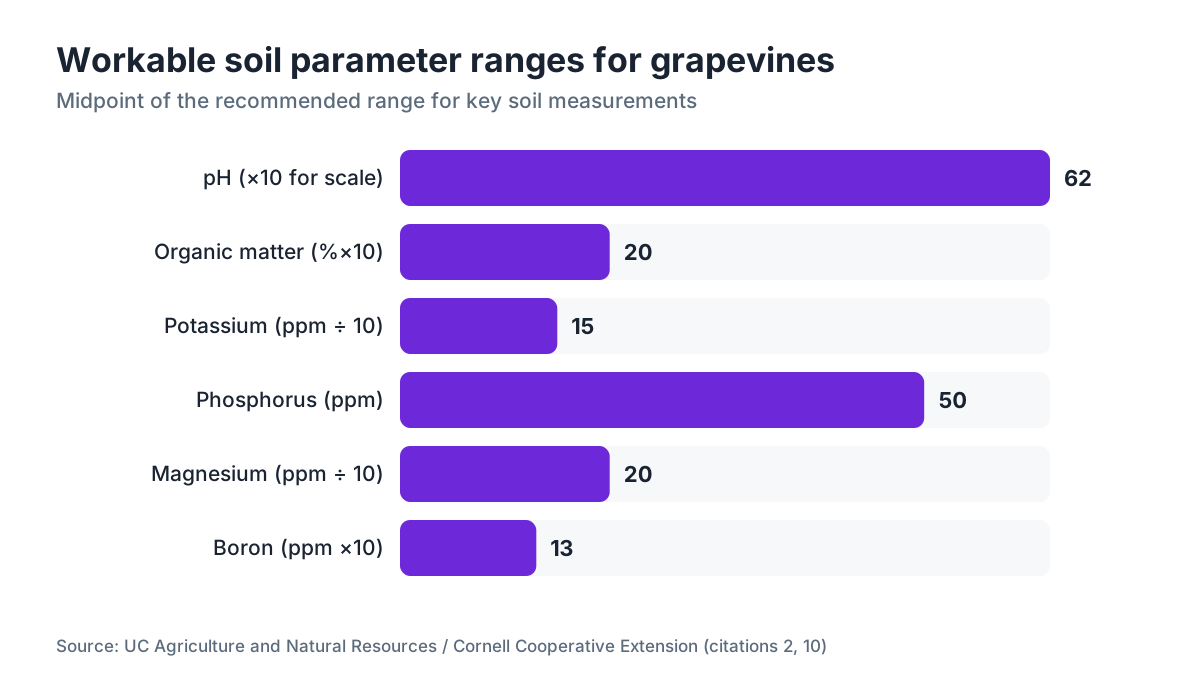
| Parameter | Workable range for vines | Notes |
|---|---|---|
| pH | 5.5 to 7.0 | Below 5.5: aluminum toxicity risk, phosphorus lockout. Above 7.5: iron/manganese chlorosis common. |
| Organic matter | 1% to 3% | Under 1% in sands: water retention suffers. Over 4%: excessive vigor risk in cool climates. |
| CEC | 5 to 30 meq/100g | Low CEC needs lighter, more frequent fertilization. |
| Phosphorus (Mehlich-3) | 25 to 75 ppm | High P suppresses mycorrhizal colonization. |
| Potassium | 100 to 200 ppm | Above 300 ppm raises fruit K and lowers titratable acidity. |
| Calcium | 1,000 to 3,000 ppm | Usually adequate if pH is in range. |
| Magnesium | 100 to 300 ppm | Ca:Mg ratio ideally 4:1 to 8:1. |
| Boron | 0.5 to 2.0 ppm | Below 0.3 ppm: fruitset problems common. |
UC Davis viticulture publications note that grapevines tolerate a wider pH range than most fruit crops, but the upper end cuts off sharply when free calcium carbonate is present, because carbonate actively drives pH toward 7.5 to 8.0 even after acidification treatments [3].
The best vineyard soil from a practical standpoint is well-drained, moderately fertile, and slightly acidic to neutral. Good drainage is non-negotiable. Vines tolerate poor nutrition far better than saturated roots. If you have one soil problem you must solve before planting, drainage is it.
How do you collect soil samples correctly from a vineyard?
Bad sampling technique ruins a perfectly good lab. A soil test is only as good as the sample that went into the bag, and sampling errors are the most common reason results don't match what the vines are telling you.
The basic protocol:
Sample by management zone, not by field. If you have a block with visually different soil colors, a transition from sandy knoll to heavier valley floor, or a history of different amendment applications, those are separate sampling zones. Pooling them makes the composite number meaningless for either area.
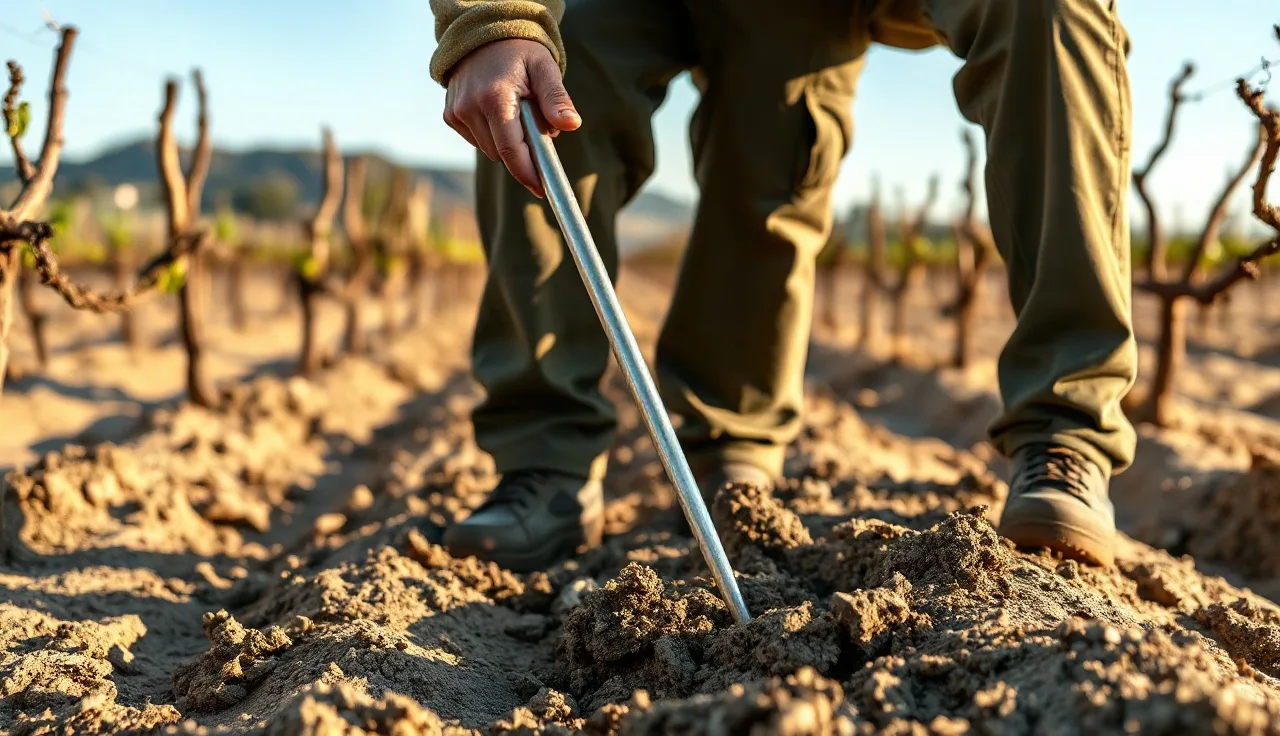
For each zone, pull 15 to 20 subsamples with a soil probe or clean spade in a random, zigzag pattern across the zone [11]. Avoid the obvious anomalies: spots near headland turns where applications pile up, areas near old compost piles, anywhere clearly different. Mix all subsamples from a zone in a clean plastic bucket, pick out plant debris and rocks, and take about a cup of the mixed soil for the bag.
Depth matters, and it's often done wrong. For an established vineyard, split your sample: 0 to 12 inches for the surface layer, 12 to 24 inches for the subsoil. Nutrients and pH can be completely different at those two depths, and vine roots work both. For a new site, go deeper: 0 to 12, 12 to 24, and 24 to 36 inches at minimum. WSU Extension recommends pre-plant deep sampling to 36 inches on any site with a history of orchard use or unknown amendment history [1].
Label samples clearly with block ID, depth, and date. Most labs provide submission forms that link sample IDs to your field map. If you keep records in a vineyard management system, that's exactly the kind of spatial data worth tracking year over year. Tools like VitiScribe let you attach lab reports to specific blocks and build a historical record without hunting through paper files.
Timing: sample in the fall after harvest, or in early spring before any fertilizer goes on. Skip sampling right after rain or irrigation, and stay outside a 30-day window after any lime or fertilizer application.
How much does vineyard soil testing cost?
Cost varies a lot by lab and panel depth. Here's the real picture:
University extension labs (Penn State, Cornell, NC State, UC Davis Extension, and others) charge roughly $20 to $30 for a standard fertility panel covering pH, buffer pH, organic matter, P, K, Ca, and Mg [4]. Add-ons for micronutrients, boron, or texture analysis typically run another $10 to $25 each.
Commercial ag labs like A&L Western Laboratories or Waypoint Analytical charge $25 to $80 for a similar base panel, with full micronutrient packages up to $50 to $100. What you buy from a commercial lab is faster turnaround (sometimes 48 to 72 hours versus 1 to 3 weeks at university labs) and often more vineyard-specific interpretation.
For a typical 20-acre vineyard with 4 to 6 distinct soil management zones, a full sampling with surface and subsoil depths runs 8 to 12 samples. At $40 to $60 per sample all-in for a decent panel, you're spending $320 to $720 every two to three years. That's not nothing, but it's a fraction of what a misapplied lime or potassium program costs.
For new site evaluation, budget more. A thorough pre-plant assessment with texture analysis, deep sampling, and a micronutrient suite on a 20-acre site might run $800 to $1,500 in lab fees, plus your time collecting and submitting. Cornell's viticulture extension program recommends pre-plant analysis as standard practice before any site development spending [2].
One thing that's genuinely a waste of money: testing every year in a stable, well-managed block with no active amendment program. pH and organic matter don't change that fast. Put the testing budget on new blocks, problem areas, or sites where you're actively trying to change something.
How do you interpret vineyard soil test results?
Most labs return results with interpretation categories: low, medium, high, excessive. In many cases those categories are calibrated for agronomic crops, not for grapevines. A phosphorus level the lab calls "high" for corn is fine, even desirable, for a low-vigor wine grape situation.
Start with pH. Everything else is filtered through it. If pH is below 5.5 or above 7.5, fix that before worrying about individual nutrients, because you can't reliably interpret or correct nutrient levels until the pH is in range.
For macronutrients in the soil, look at the ratios before the raw numbers. The base saturation percentages most labs report alongside CEC are more useful than ppm for grapevines. Ideal base saturation targets most extension programs cite: calcium 65 to 75%, magnesium 10 to 15%, potassium 2 to 5% [10]. A potassium percentage above 5 to 6% of CEC is a warning sign for high-K juice problems in some varieties, even if the raw ppm number looks normal.
Organic matter below 1% on a coarse-textured soil calls for a plan to build it: cover crops, compost, or both. Don't expect fast results. Raising organic matter by even 0.5% in a 6-inch layer takes years of consistent inputs.
Boron deficiencies show up in analysis before they show up as poor fruitset, which is why testing for it pre-bloom matters. UC Cooperative Extension recommends petiole tissue sampling at bloom and veraison to cross-check soil nutrient readings, because soil test accuracy for micronutrients is less reliable than for macronutrients and pH [3].
The lab report is a map, not a prescription. Always match soil results against vine performance: canopy density, petiole analysis, fruit composition history. A soil test showing medium potassium on a block that consistently delivers high-pH, low-TA juice should trigger a harder look at potassium management regardless of what the absolute number says.
How does soil pH affect grapevines specifically?
pH controls nutrient availability more than any other single soil measurement. At low pH (below 5.5), aluminum and manganese turn soluble at levels toxic to roots. Molybdenum becomes unavailable. Phosphorus ties up. Mycorrhizal fungi, which grapevines lean on for phosphorus uptake, are inhibited by very low pH.
At high pH (above 7.5), iron and manganese become insoluble. That's the most common cause of lime-induced chlorosis in vineyards, especially in high-carbonate soils common across parts of the Central Valley, Washington's Columbia Valley, and limestone-influenced soils in the Texas Hill Country and Missouri Ozarks. The yellowing you see between the veins on young leaves is iron deficiency, and it won't respond to iron sprays until you've either acidified the soil or grafted onto a rootstock that tolerates high pH.
Rootstock selection is your first and most powerful tool for pH management, ahead of soil chemistry. Some rootstocks (SO4, 5BB, 41B) tolerate high lime and carbonate far better than ungrafted vines or rootstocks like 3309C and 101-14 Mgt, which do poorly on high-pH soils. Cornell's rootstock guide covers this in practical detail [2].
To lower pH, apply elemental sulfur. Sulfur-oxidizing bacteria convert it to sulfuric acid slowly, over 6 to 12 months. The rate depends on your buffer pH reading and your soil texture. A sandy soil might need 300 to 500 lb/acre of sulfur to drop pH by one unit; a high-clay or organic-matter-rich soil might need 2,000 lb/acre or more for the same change [1].
To raise pH, apply lime. Agricultural limestone (calcium carbonate) is the standard. Calcitic lime raises calcium; dolomitic lime raises both calcium and magnesium. If your Ca:Mg ratio is already fine, use calcitic. If magnesium is also short, dolomitic makes more sense. Apply and incorporate before planting whenever you can.
What soil physical properties matter most for a vineyard site?
Drainage is the top physical property, and it kills more vines than anything else. Grapevine roots need oxygen. Saturated soils suffocate roots and invite Phytophthora and other root pathogens. No chemical amendment fixes a soil that sits wet for weeks after rain.
Before any other evaluation on a new site, dig profile pits to 4 feet in several locations. Look for mottling (gray, orange, or rusty blotches in the soil matrix) at any depth. Mottling means seasonal water saturation. A mottled layer at 18 inches is a drainage problem even if the surface looks fine. A percolation test (measuring how fast water drains through a hole) gives you a number to work with.
Texture drives everything else. A sandy loam (roughly 60 to 70% sand, 15 to 20% silt, 10 to 15% clay) drains well, warms early, and is easy to manage, but it needs more frequent irrigation and loses nutrients faster. A clay loam holds water and nutrients but warms slowly, compacts under traffic, and can go anaerobic. There's no universally better texture for wine quality. Many of the world's great wine regions run on clay-heavy soils (right bank Bordeaux) or pure sand (some Barossa floor blocks). What matters is that you know what you have and manage accordingly.
Rootzone depth is underappreciated. A shallow soil over bedrock or hardpan limits root depth and vine water access, which sounds bad but in warm, dry climates often creates the regulated water stress that concentrates fruit. A deep, loamy soil in a cool, humid climate drives excessive vigor and dilution. That same deep soil in a dry climate with drip irrigation is your most manageable tool. NRCS Web Soil Survey maps texture, drainage class, and CEC for most of the country, so you can rough out a site before you ever pull a sample [8].
Soil compaction, measured with a penetrometer, matters most in vineyards with a long history of mechanization. A reading above 300 psi at 6 to 12 inches indicates a tillage pan that limits root penetration. Deep ripping before planting breaks it up; reduced traffic and permanent or semi-permanent midrow cover crops keep it from coming back.
How often should you test vineyard soil?
The short answer: every two to three years for established blocks, before every new planting, and any time you're actively trying to change something.
For established producing vineyards, the two-to-three-year rhythm gives you a trend line without over-sampling stable soils. pH and organic matter change slowly. Potassium can shift faster if you're applying heavily or working a leaching sandy soil, so in potassium-intensive programs, annual sampling of a subset of your most responsive blocks makes sense.
For new site development, the sequence is: soil sampling and analysis before you spend money on site work, then again 1 to 2 years after pre-plant amendments are incorporated and before vines go in. Confirm your corrections worked before the trellis is in the ground.
Any time you see symptoms that suggest a nutrient problem, pull a soil sample. Then pull petiole samples too. Soil alone isn't enough, because soil tests don't tell you what the vine is actually absorbing; tissue analysis fills that gap. Soil plus petiole testing is the standard diagnostic protocol at land-grant extension programs and most private viticulture consultants.
If you use drip irrigation, sample under the emitter and in the dry zone between emitters separately at least once. Drip systems concentrate salts and nutrients in the wet bulb, and the soil test from the wet zone can read very differently from a standard midrow sample. This matters most in arid regions like Paso Robles or California's Central Valley, where salinity and sodium accumulation under drip emitters is a real long-term management issue.
What amendments do vineyard soil test results commonly recommend?
The most common recommendation by volume is agricultural limestone to raise pH. Vineyards planted on naturally acidic soils (common in the eastern U.S., the Pacific Northwest, and humid regions) need lime before establishment and periodic maintenance afterward, because ongoing nitrogen fertilization keeps acidifying the soil.
Elemental sulfur to lower pH is second. Soils with naturally high pH from carbonate parent material or calcareous subsoil intrusions need sulfur applied and timed over multiple seasons. Single large applications don't work as well as smaller repeated ones over 2 to 3 years.
Gypsum (calcium sulfate) fills a niche: it supplies calcium and sulfur without raising pH, and it helps on sodic soils where sodium has displaced calcium on exchange sites and broken down structure. If your soil analysis shows high sodium (expressed as sodium adsorption ratio, or SAR) alongside poor structure, gypsum is your first amendment.
Potassium deficiency is corrected with potassium sulfate or potassium chloride. Potassium sulfate is preferred for vines, because chloride at high rates can accumulate to phytotoxic levels, especially in low-rainfall irrigated situations. Apply based on your CEC: a low-CEC sandy soil gets smaller, more frequent applications; a high-CEC clay gets less frequent but larger ones.
Boron is corrected with borax or Solubor foliar sprays. The window between deficiency and toxicity for boron is narrow, so never apply boron to the soil without a confirmed deficiency reading below the threshold. Boron toxicity is hard to reverse.
For organic matter, compost is the standard input. It takes a lot of it over a long time to move the number. A realistic plan for raising OM from 1% to 2% in a 6-inch layer might need 5 to 10 tons of quality compost per acre per year for several years, plus cover cropping. There's no shortcut.
What compliance considerations apply to vineyard soil amendments?
Most soil amendments for vineyards aren't heavily regulated products, but a few compliance angles are worth knowing.
If you're certified organic or in transition, every input must be approved under the USDA National Organic Program (NOP). Elemental sulfur is allowed. Agricultural lime is allowed. Synthetic fertilizers are not [9]. The Organic Materials Review Institute (OMRI) lists approved products, and your certifying agency will want records of what went on and when. Keep purchase receipts and application records.
Pesticide records don't typically cover lime, sulfur used as a soil amendment, or compost, but copper-based materials are a different case. Copper sulfate applied as a soil amendment, even for pH or nutrient purposes, may require record-keeping in some states. More to the point, the EPA Worker Protection Standard (WPS) applies to any worker handling concentrated fertilizer or amendment solutions with irritant properties [5]. Granular lime in normal use doesn't trigger WPS; certain liquid fertilizer concentrates do. Know your state's specific requirements.
In California, Proposition 65 and CDFA regulations add a layer: certain fertilizer materials must be registered with CDFA, and labels must be followed. The California Department of Food and Agriculture's Fertilizer Research and Education Program maintains the list of registered materials [6].
Nutrient management plans are required in some states for operations above certain size thresholds, particularly near water bodies or in nitrate-sensitive groundwater zones. States like New York, Washington, and Virginia run nutrient management planning programs through their departments of agriculture that apply to vineyard operations meeting certain criteria.
Clean records of your soil test results and matching amendment applications are more than good agronomy. They create a defensible paper trail if you're ever audited for nutrient management compliance, and they're the baseline data you need for organic certification. A system that links lab reports to block records and timestamps every application saves hours when a certifier or state inspector asks for documentation.
How does soil analysis fit into a complete vineyard nutrition program?
Soil analysis is one leg of a three-legged stool. The other two are petiole tissue analysis and direct vine observation.
Soil analysis tells you what's there and potentially available. Petiole analysis at full bloom (most vine nutrition work references the petiole opposite a cluster at full bloom, the internationally standard timing) tells you what the vine actually took up. Vine observation, looking at shoot growth rate, leaf color, fruitset, and canopy density, tells you the functional outcome.
All three need to point the same direction before you make a confident amendment decision. A soil test showing low potassium, petiole analysis showing low potassium, and vines showing marginal leaf symptoms: that's a clear prescription. A soil test showing low potassium but normal petiole levels and vigorous vines: don't fertilize. Figure out why the vine is feeding fine despite what the soil says.
The timing sequence that works: pull soil samples in fall. Get results back over winter. Use them to plan spring amendment applications. Then pull petiole samples at bloom in early summer. Compare those against your bloom-timing reference values from UC Davis or Cornell [2][3]. Adjust your midsummer or post-harvest fertilizer decisions based on where your petioles landed against the sufficiency ranges.
For record-keeping, this creates a seasonal rhythm: soil results tied to fall sampling dates and pre-plant applications, petiole results tied to bloom and veraison, spray and application records tied to in-season work. Keeping those records organized and linked to specific blocks instead of scattered across binders and email attachments is exactly the kind of operational problem a platform like VitiScribe is built to solve, especially once you're running more than a few distinct blocks.
New growers often ask which to start with, soil or tissue. Start with soil. If your pH is off, your tissue analysis will reflect deficiencies that are entirely pH-driven, and chasing tissue numbers with fertilizer while ignoring pH is expensive and ineffective.
Frequently asked questions
What is the best pH for vineyard soil?
Most grapevine varieties perform best in soil with pH between 5.5 and 7.0. Within that range, 6.0 to 6.5 is a sweet spot where macronutrients and most micronutrients are all available and aluminum toxicity isn't a concern. Below 5.5, aluminum and manganese turn soluble at harmful levels. Above 7.5, iron and zinc become largely unavailable, and lime-induced chlorosis is common.
How do I know if my vineyard soil needs lime?
A soil test showing pH below 5.5 in the rootzone, paired with a buffer pH reading, gives you both the problem and the prescription. The buffer pH tells the lab how much lime is needed per acre to reach your target pH. Don't apply lime without both numbers. A standard agronomic lab recommendation calculates tons per acre of agricultural limestone based on your soil's buffering capacity and the depth of incorporation.
Can vineyard soil be too fertile?
Yes. Excessive fertility, especially nitrogen and potassium, drives excessive vine vigor: dense canopies, shaded fruit, poor color and flavor development, and more disease pressure. High soil potassium also raises juice potassium, which lowers titratable acidity and pushes must pH up, a real problem for red wines. Some of the world's highest-quality vineyard soils are nutrient-poor. Moderate to low fertility is not a problem in itself.
How deep should I sample for a pre-plant vineyard soil test?
For a new site, sample to at least 36 inches in three layers: 0 to 12, 12 to 24, and 24 to 36 inches. Vine roots work the entire profile, and subsoil pH, salt levels, and water-holding properties can differ dramatically from the surface. WSU Extension recommends this depth protocol for any new planting, particularly on sites with unknown amendment history or previous orchard use.
What's the difference between a soil test for vineyards versus row crops?
The same basic parameters apply, but the interpretation thresholds differ and the emphasis shifts. Vineyards are less nitrogen-dependent than row crops, so soil nitrogen testing is less predictive; petiole tissue analysis drives nitrogen decisions instead. Potassium management for vineyards focuses on juice quality impacts more than yield. And micronutrients like boron and zinc get more attention in viticulture because of their direct effects on fruitset and bunch structure.
How do I test soil drainage before planting a vineyard?
Dig profile pits to 4 feet in multiple locations across the site and look for mottling: gray or rust-colored zones that mean seasonal saturation. Then run a simple percolation test: fill a 12-inch deep hole with water, let it drain, refill it, and time how fast the water drops. Less than 1 inch per hour means poorly drained soil. Do the pit evaluation after heavy rain, when the water table is at its seasonal high.
Does cover cropping change what my soil test will show?
Over time, yes. Permanent or semi-permanent cover crops build organic matter, improve soil structure, and can shift pH slightly as root exudates and decomposing biomass add organic acids. Cover crops also compete with vines for nitrogen and potassium, which can lower soil nutrient levels. Sample at a consistent time of year relative to when cover is mowed or terminated, so you're comparing apples to apples across years.
What is cation exchange capacity and why does it matter for vineyards?
CEC measures how many positively charged nutrient ions a soil can hold per unit weight. Sandy soils have low CEC (under 5 meq/100g); clay and organic-matter-rich soils are high (20+ meq/100g). Low-CEC soils lose potassium, magnesium, and calcium to leaching faster, so they need smaller, more frequent fertilizer applications. High-CEC soils hold nutrients longer but can also lock up excesses. Your fertilizer timing and rate strategy should start from your CEC.
Should I test soil or leaves (petioles) to diagnose a nutrient deficiency in my vineyard?
Do both. Soil analysis shows what's present and potentially available in the rootzone. Petiole tissue analysis at full bloom shows what the vine actually absorbed. The two can diverge sharply: adequate soil levels don't guarantee uptake if pH is out of range or root health is compromised. Relying on soil alone leads to over-fertilization. Relying on tissue alone misses the underlying pH and physical issues driving the deficiency.
How do organic certifications affect which soil amendments I can use in a vineyard?
Under the USDA National Organic Program, synthetic fertilizers are prohibited. Elemental sulfur, agricultural limestone, and compost from approved sources are allowed. Certain potassium and trace mineral sources are allowed with restrictions. You must document every input with purchase records and application logs. The OMRI database lists products reviewed for organic compliance. Your certifying agency has final say on materials, so confirm approvals before purchase.
What soil types are common in wine regions, and does soil type predict wine quality?
Common vineyard soils include limestone and clay in Burgundy and Bordeaux, granite and schist in the Rhone and Douro, volcanic soils on Etna and in parts of Napa, and sandy loams across many New World regions. Soil type correlates with wine style in some cases, but the mechanism is usually indirect: soil affects drainage, vine water status, and vigor, which affect berry size and composition. No single soil type guarantees quality across climates and varieties.
How do I compare soil test results across years to track changes in my vineyard?
Use the same lab, the same sampling method, the same depth, and the same time of year for every cycle. Switching labs between years can shift your numbers by 5 to 15% on identical samples because extraction methods differ. Most university labs use Mehlich-3 extraction for most nutrients; commercial labs vary. If you switch labs, run a split sample through both to establish a conversion factor before comparing to prior years.
Sources
- Washington State University Extension, Soil Management and Nutrition for Vineyards: Pre-plant lime incorporation is more effective than post-establishment application; corrective lime moves slowly through the profile of established vineyards. Pre-plant deep sampling to 36 inches recommended for new sites.
- Cornell University Cooperative Extension, Viticulture and Enology: Pre-plant soil analysis is standard practice before site development; calcium-to-magnesium ratios and rootstock tolerance to high-pH soils are covered in Cornell's viticulture guidance.
- UC Cooperative Extension, UC Davis Department of Viticulture and Enology: Grapevines tolerate a wide pH range but free calcium carbonate drives pH toward 7.5 to 8.0 even after acidification; petiole sampling at bloom and veraison is recommended to cross-check soil nutrient data.
- Penn State Extension, Soil Testing Laboratory: Standard soil fertility panels at university extension labs cost approximately $20, $30, covering pH, buffer pH, organic matter, phosphorus, potassium, calcium, and magnesium.
- U.S. EPA, Worker Protection Standard (WPS) for Agricultural Pesticides: The EPA Worker Protection Standard applies to workers handling certain agricultural chemical inputs with irritant properties; vineyard operators must understand which inputs trigger WPS obligations.
- California Department of Food and Agriculture, Fertilizer Research and Education Program (FREP): California fertilizer materials must be registered with CDFA; FREP maintains the list of registered materials and label compliance requirements.
- USDA Natural Resources Conservation Service, Web Soil Survey: NRCS Web Soil Survey provides mapped soil data including texture, drainage class, and CEC for vineyard site evaluation prior to sampling.
- USDA National Organic Program, Organic Regulations: Under NOP regulations, synthetic fertilizers are prohibited in certified organic viticulture; elemental sulfur and agricultural limestone are allowed inputs.
- University of California Agriculture and Natural Resources, Nutrient Management Guidelines for Wine Grapes: Ideal base saturation percentages for grapevines: calcium 65 to 75%, magnesium 10 to 15%, potassium 2 to 5% of CEC. Boron deficiency threshold below 0.3 to 0.5 ppm in soil.
- Oregon State University Extension Service, Soil Testing for Vineyards: Soil sampling protocol recommends 15 to 20 subsamples per management zone, with surface (0 to 12 in) and subsoil (12 to 24 in) depths treated as separate samples in established vineyards.
Last updated 2026-07-09