How to record a soil profile pit observation for site evaluation
TL;DR
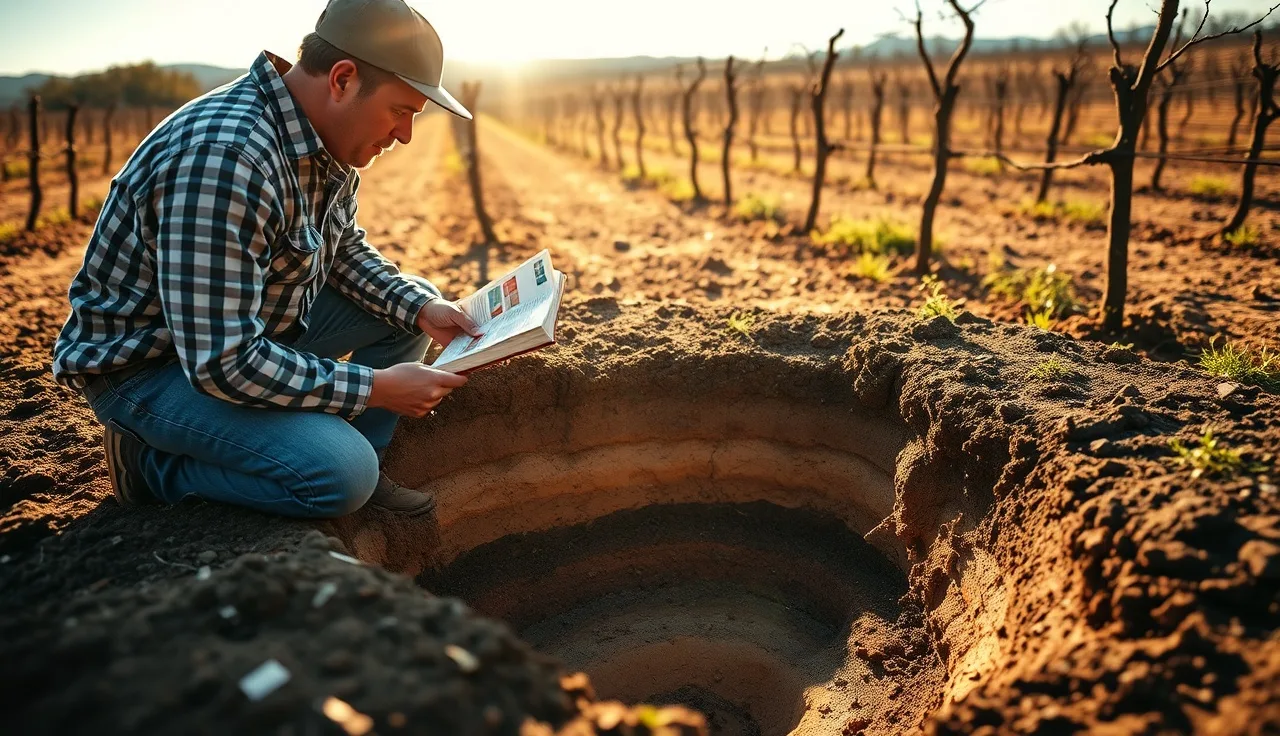
- Dig a pit at least 4 feet deep and 3 feet wide, then record each soil horizon's depth, texture, color (Munsell notation), structure, mottling, compaction, and drainage.
- Log root presence and any restrictive layers.
- A complete, dated observation record is your baseline for rootstock selection, irrigation design, and long-term vineyard compliance paperwork.
Why does a soil profile pit matter for vineyard site evaluation?
A surface soil test tells you chemistry. A profile pit tells you everything else: whether water will move, whether roots can actually push down, whether you'll fight hardpan for the life of the block. Those answers shape every big decision you make before a vine goes in the ground.
Viticulture extension programs at UC Davis and Washington State University both treat the profile pit as the most informative tool in pre-plant site assessment [1][2]. That's not enthusiasm talking. No amount of remote sensing, electrical resistivity mapping, or satellite imagery replaces the information you get from pulling out a wall of soil and staring at it.
The pit also creates a legal record. If you're in a state with agricultural land conversion permits, water use plans, or winery licensing tied to vineyard acreage, a documented soil observation shows due diligence. Some California counties require soil investigation reports as part of conditional use permits for new agricultural operations.
For small vineyard operations and winery owners running their own vineyard development, getting this observation right the first time saves real money. A hardpan layer missed at 28 inches has dropped growers into ripping or drainage tile projects they never budgeted for.
How deep and wide should a soil profile pit be for a vineyard?
The working minimum for vineyard site evaluation is 5 feet (150 cm) deep, and 6 feet is better if you can reach it safely [1]. The observation face should be at least 3 feet wide, enough room to work in and take photos without the sidewall throwing shadow across your Munsell readings.
Many extension recommendations set 120 cm (about 4 feet) as an absolute floor, because most restrictive layers that matter to grapevine roots show up between 60 and 120 cm [2]. If you see clay accumulation or mottling in that band, keep going until you understand its full extent.
Backhoe or mini-excavator digs are the practical choice on most sites. Hand-digging a 5-foot pit in anything heavier than loamy sand is brutal and slow. If you're renting equipment for site prep anyway, schedule the pits first.
Safety is not optional. OSHA 29 CFR 1926.652 requires protective systems for excavations 5 feet or deeper where a person enters [3]. For a pit you step into to read horizons, that means sloped walls, shoring, or a protective system rated for the soil type. Plenty of observers read from the excavator bucket or from the edge at shallower depths. If you go in, treat it like a confined-space-adjacent task and keep someone topside.
What tools do you need to describe a soil profile pit?
Here's the short list. A Munsell Soil Color Chart (the physical book, not a phone app, for formal records), a measuring tape or folding rule, a sharpshooter spade for cleaning the observation face, a texture ribbon kit or a set of reference materials, a knife or penetrometer for testing consistence, a spray bottle for moistening samples, and a field data sheet.
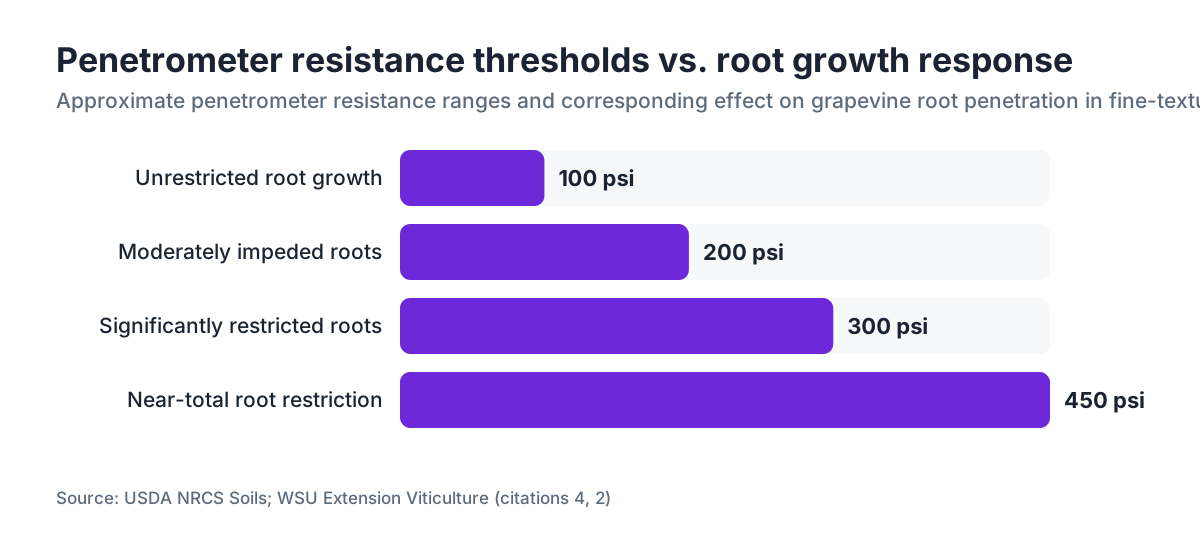
A digital penetrometer runs roughly $80 to $200 depending on the model. It gives you a number in pounds per square inch or kilograms per square centimeter for each horizon, which is far more defensible in a report than "felt hard" [4]. Root penetration in fine-textured soils drops sharply once bulk density passes about 1.65 g/cm³, and penetrometer resistance above 300 psi tracks that range [2].
A pH field kit or handheld meter matters if you suspect carbonate layers. Look for white coatings on ped faces or fizzing when you apply 10% HCl. Carbonates change iron availability and vine growth by a lot.
For photos: a gray card reference and a labeled depth stake. Photos without depth context are almost useless when you're reviewing them in an office six months later.
Bring a clean tarp too. Lay excavated soil out by depth so you can examine it and return it in sequence when you backfill.
How do you identify and measure soil horizons in the pit?
Clean the observation face first with the back of your spade to strip off the smear the bucket left. A clean cut exposes natural ped structure. Let the face dry a few minutes in the sun if you can, because color differences jump out once the surface loses its sheen.
Horizons are distinct layers that differ in color, texture, structure, or consistency. The USDA system uses master horizon designations: O (organic surface), A (topsoil with organic matter mixed in), E (leached, lighter colored), B (subsoil accumulation zone), C (parent material), and R (bedrock) [5]. In most vineyard soils you're mainly reading A, B, and C. The B horizon is where the interesting problems hide.
Measure the upper and lower boundary of each horizon from the surface. Record boundary distinctness (abrupt, clear, gradual, diffuse) and topography (smooth, wavy, irregular, broken). A gradual, wavy boundary between A and B is normal. An abrupt, smooth boundary often signals a textural contrast that changes how water moves.
For each horizon, record:
- Top depth and bottom depth in centimeters
- Color (Munsell hue, value, chroma) for moist and dry conditions
- Texture class (sand, loamy sand, sandy loam, loam, silt loam, clay loam, clay, etc.)
- Structure (type, grade, size)
- Consistence (loose, friable, firm, very firm, extremely firm when moist; stickiness and plasticity when wet)
- Coarse fragments (percent by volume, type)
- Mottles or redoximorphic features (color, quantity, size, location)
- Roots (quantity, size classes)
- Special features: pores, films, concretions, coatings
The USDA Soil Survey Manual is the reference document for horizon description conventions [5]. UC Cooperative Extension guidelines for vineyard soil assessment use the same system [1].
How do you read Munsell soil color and why does it matter for vineyards?
Munsell notation reads as hue value/chroma. A reading of 10YR 4/3 means hue = 10YR (yellow-red range), value = 4 (moderately dark), chroma = 3 (low saturation, brownish). You match the moist soil against the chips in the Munsell book under natural light, ideally not direct overhead sun.
Color tells you plenty. Dark A horizons (value 2-3, chroma 1-2) carry meaningful organic matter. Bright, high-chroma B horizons (7.5YR or 5YR hues, chroma 4-6) mean good aeration and oxidized iron. Low-chroma grays and blue-greens (chroma 1-2, gleyed colors) in the B or C horizon mean seasonal or permanent saturation. A gleyed layer at 30 inches is a drainage red flag, full stop.
Mottles are patches of a different color inside a horizon. Gray mottles in an otherwise oxidized matrix point to episaturation, where water sits seasonally at that depth. The USDA uses a formal mottling classification: abundance (few, common, many), size (fine, medium, coarse), and contrast (faint, distinct, prominent) [5].
In Paso Robles and other warm interior regions, carbonate accumulation (Bk horizons) often shows as very pale brown to white in the 5Y or 2.5Y hues, with fine white threads or masses. Those raise pH and tie up trace elements.
Record both moist and dry colors when you can. The gap between them tells you how the soil behaves across seasons.
What is a soil texture ribbon test and how accurate is it?
The ribbon test estimates texture class with no lab gear. Take a golf-ball-sized sample, moisten it to a putty consistency, and press it between thumb and forefinger to form a ribbon. The ribbon's length and feel place the texture.
Sand feels gritty and won't ribbon at all. Sandy loam barely ribbons, under half an inch. Clay loam ribbons 1 to 2 inches and feels plastic. Clay ribbons 2 inches or more and feels sticky and heavy. The full flow chart lives in the USDA's guide to soil texture by feel [5][6].
Accuracy is decent for the field, with real limits. High organic matter can make a sandier soil feel stickier than it is. Smectite clays, common in the Pacific Coast ranges, feel more plastic than their particle-size distribution suggests. Lab particle-size analysis (hydrometer or pipette method) is the gold standard. For formal reports, especially anything supporting water permits or irrigation design, send samples to a certified lab.
For vineyard work the ribbon test is good enough to drop a horizon into a general texture family, which sets your drainage and water-holding read. You're hunting for the major contrasts, like a sandy loam A over a clay B. That contrast drives perched water table risk and rootstock choice.
How do you assess drainage class and restrictive layers in the pit?
Drainage class runs from excessively drained to very poorly drained, and the USDA has formal definitions for each [5]. You infer it from mottling, gleying, depth to saturation features, and what you see during or after rain. Six classes matter most for vineyards:
| Drainage Class | Profile Characteristics | Vineyard Suitability |
|---|---|---|
| Excessively drained | No mottles above 60", rapid permeability | Low water-holding, stress-prone |
| Somewhat excessively drained | No mottles above 40", rapid-moderate permeability | Good for many Vitis vinifera |
| Well drained | No mottles above 40", moderate permeability | Generally ideal |
| Moderately well drained | Mottles at 18-36", slow permeability somewhere | Acceptable, may need tile |
| Somewhat poorly drained | Mottles at 6-18", wet seasonally | High risk, needs drainage |
| Poorly drained | Gleyed colors near surface, wet most of year | Usually unsuitable |
Restrictive layers are any horizon that blocks root growth or water movement. Common ones in vineyard soils: fragipan (brittle, dense B horizon), duripan (silica-cemented, found across many California soils), claypan (abrupt textural B with high clay content), and bedrock. Fragipans feel firm when dry but soften when wet. Duripans do not.
Test for them by pushing a soil probe, a rebar rod, or a penetrometer through each horizon. An impenetrable layer at 24 inches means you're designing a shallow-rooted vineyard, and both rootstock and irrigation strategy have to reflect it. WSU Extension notes that vine roots concentrate above restrictive layers, and that this shapes how the block handles drought stress [2].
How many pits do you need to evaluate a vineyard block?
One pit per major soil mapping unit, at the very least. Most soil scientists recommend one pit per 5 to 10 acres for a new vineyard, plus extra pits at transitions between soil types, at low spots, and at upper slope positions [1][2].
For a 20-acre block on fairly uniform ground, three to four pits is a defensible baseline. Complex terrain climbs from there. Mountain sites with real slope variation often warrant a pit at the summit, mid-slope, and toe slope of each aspect, because those positions can hold dramatically different profiles even over short distances.
Supplement pits with soil probe samples to read the variability between pit locations. A probe pulls a continuous core to about 36 to 48 inches, not deep enough to catch every restrictive layer, but it gives you a fast read on the A horizon and upper B across dozens of spots.
Document each pit with GPS coordinates, not "north end of block." When you write the site evaluation report, a map showing pit locations against topography and soil type boundaries makes the whole thing far more useful.
What exactly should your field data sheet record for each pit?
A complete pit record has two parts: the site-level header and the horizon-by-horizon body.
Header fields:
- Date and time of observation
- Observer name(s)
- GPS coordinates (datum noted, WGS84 is standard)
- Legal description or parcel number
- Slope percent and aspect
- Surface stoniness and rock outcrop percent
- Vegetation or current land use
- Weather at time of observation
- Depth to water table if encountered
- Photo file names or numbers
- Pit dimensions
Horizon fields (repeat for each):
- Horizon designation (e.g., Ap, Bt1, Bt2, Bk, C)
- Upper and lower boundary depth in cm
- Boundary distinctness and topography
- Munsell color, moist and dry, matrix and mottles
- Texture class (field)
- Structure: grade, size, type
- Consistence: moist, wet (stickiness, plasticity)
- Coarse fragments: percent, size, kind
- Pores: quantity, size
- Roots: quantity, size
- Special features: clay films, coatings, concretions, carbonates
- Penetrometer readings in psi or bar
Cornell's viticulture extension has published site evaluation worksheets built on this structure [7]. UC Davis viticulture protocols follow the same Soil Survey Manual framework [1]. Keep the original paper field sheet and scan or photograph it. If you're managing multiple blocks across multiple vintages, a digital system makes retrieval practical. VitiScribe's record-keeping module stores pit observation records alongside your spray logs and compliance documents, so everything lives in one searchable place.
The paper record is the legal original. The digital copy is what you'll actually use.
How do soil profile pit results affect rootstock selection?
Rootstock selection is where your pit data does its most immediate work. Drainage class, clay content, presence of limestone or carbonate layers, and depth to any restriction each narrow your options meaningfully.
For soils with real lime content (pH above 7.5, positive HCl fizz, high carbonate equivalent), you need a lime-tolerant rootstock, because iron chlorosis from lime-induced deficiency hammers both yield and quality. 41B and Fercal are the classic picks for high-lime soils, with Fercal showing the highest lime tolerance in most trial data [8]. On heavy clay with periodic saturation, 420A or SO4 handle wet feet better than vigorous options like 1103P.
Shallow soils over bedrock or duripan push you toward lower-vigor rootstocks and denser irrigation systems. Deep, well-drained sands favor high-vigor rootstocks and deficit irrigation.
WSU Extension's rootstock guidance ties soil profile characteristics directly to rootstock performance in Pacific Northwest conditions [2]. UC Cooperative Extension farm advisors working the South Coast area and other complex-geology regions run the same matching logic. No rootstock trial data overrides what you see in the pit. The pit is the ground truth.
What regulations apply to soil pit excavation on agricultural land?
OSHA's excavation standard (29 CFR 1926 Subpart P) kicks in any time an employee enters an excavation 5 feet or deeper [3]. The standard requires sloping the walls at a safe angle based on soil type, using a trench box or shoring, or using another protective system. Type C soil (wet, sandy, or previously disturbed) requires 1.5H:1V slopes. Type B soil requires 1H:1V. Even on shallow pits, if a person is inside, take it seriously.
On the pesticide side: a soil profile observation during site evaluation isn't itself regulated, but if it happens in a block where workers are present and pesticides were applied recently, the EPA Worker Protection Standard early-entry rules cover anyone entering treated fields [9]. Agricultural employers must train field employees on WPS requirements before entry, and restricted-entry intervals have to be observed.
Some states pile on more. California's Division of Occupational Safety and Health (Cal/OSHA) has its own excavation standard, at least as strict as the federal version. Check your state OSHA plan if you're outside federal OSHA jurisdiction.
Environmental permits: if the site evaluation rides on top of a larger land conversion or grading project, state or county grading permits may require that soil disturbance from excavation be logged and the pit properly backfilled. Call your local planning department before you dig.
How do you backfill and close the pit after observation?
Backfill in reverse order: the material you pulled out last (deepest horizon) goes back first. This matters. Dump the clay-rich subsoil on top and the topsoil on the bottom and you've built an artificial inverted profile that will cause water management headaches if vines ever root into it.
Tamp each layer lightly to cut settling, but don't over-compact. A backhoe wheel driven over the fill packs it harder than hand tamping ever will. In coarse soils the pit will settle several inches over the first winter. Mark the location on your site map and check it the following spring.
Pull out any large rocks or debris that came up. Surface rocks left around a backfill zone can chew up tillage equipment if vines aren't in yet.
Some growers set a permanent marker (a short T-post or colored stake) at pit locations so they can come back for re-observation in a few years. That's genuinely useful if you're tracking drainage improvements from tile installation or checking on amendments.
How should soil profile pit data feed into a final site evaluation report?
A site evaluation report that supports vineyard planning has to synthesize the pit data, more than transcribe it. For each major soil type, you're drawing conclusions: what's the rooting depth, what's the drainage class, what management constraints does this force.
The report structure that works:
- Site description and location (with map)
- Methods (how many pits, when, by whom, reference system used)
- Pit-by-pit horizon descriptions in tabular form
- Interpretation: drainage class, rooting potential, rootstock implications, irrigation design implications, any amendments warranted
- Recommendations
- Appendices: all field data sheets, photos with depth scales, lab results if any
If this is going to a county planning department, a lender, or a water district, put the raw data sheets in the appendix. Reviewers want to see the original observation, more than your interpretation of it.
For a sanity check on your own methods, the Natural Resources Conservation Service Web Soil Survey is a useful cross-reference. It publishes NRCS mapping unit descriptions for most agricultural soils in the US, and you can compare them against your field observations [10]. If your field description and the NRCS description split hard, figure out why. Sometimes you're in an inclusion or a mapped variant. Sometimes the original survey ran at a coarse scale and your pit caught something it missed.
Keeping these reports organized over time, as you add blocks, change irrigation systems, or install drainage, is where a digital record system earns its keep. VitiScribe's document storage links pit records to block maps, so you're not digging through folders when a consultant asks about the 2019 east block evaluation.
Frequently asked questions
What is the minimum pit depth for a vineyard soil evaluation?
Most extension guidelines call for a minimum of 120 cm (about 4 feet), with 150 to 180 cm preferred. UC Davis and WSU viticulture programs both recommend going to at least 5 feet, because important restrictive layers, seasonal saturation zones, and parent material characteristics often appear between 40 and 60 inches. Hit bedrock or a cemented pan before that? Document it and stop.
Do I need a professional soil scientist to do a vineyard soil pit evaluation?
Not always. It depends on the purpose. For your own planning and rootstock calls, a well-trained vineyard manager using standard USDA horizon description methods is fine. For reports headed to county planning, water agencies, or lenders, a licensed professional soil scientist or a certified crop adviser with soil classification credentials adds credibility and cuts risk. Some California county permits explicitly require a qualified soil scientist's signature.
What does mottling in a soil profile indicate for grapevine roots?
Mottling, the gray, yellow, or orange patches inside a horizon, points to periodic or seasonal water saturation. Gray low-chroma mottles mean that zone runs oxygen-depleted part of the year, which stresses grapevine roots. The depth where mottling starts is a proxy for the seasonal high water table. Mottles shallower than 60 cm (24 inches) generally signal drainage conditions that limit vine performance without tile drainage.
How do I test for a hardpan or duripan in the field?
Push a metal probe, knife, or penetrometer into the horizon. A true duripan does not soften with water and resists 300 psi or more of penetrometer pressure. Apply a few drops of 10% HCl to separate silica cementation from carbonate cementation. Duripans are silica-cemented and won't fizz. Calcic horizons fizz hard. Both restrict roots and drainage, but their origins and their response to ripping differ.
How many soil pits per acre should I dig for a new vineyard?
Industry practice and extension guidance point to one pit per 5 to 10 acres, plus extra pits at major landscape position changes. For a 20-acre block with two apparent soil map units, four pits is a reasonable minimum. Complex terrain with multiple slope aspects and real elevation change wants denser sampling. Supplement with a soil probe survey between pits to read lateral variability more cheaply.
What is the Munsell color system and how do I use it for soil description?
Munsell notation describes soil color with three dimensions: hue (the color family, such as 10YR), value (lightness, 1-10), and chroma (color intensity, 1-8). Hold a moist soil sample against the chips in a Munsell Soil Color book under natural diffuse light and find the closest match. Record it as, for example, 7.5YR 4/4. Gray colors at chroma 1-2 flag drainage problems. Red and orange hues at high chroma mean oxidizing, well-aerated conditions.
What OSHA rules apply when workers enter a soil profile pit?
OSHA 29 CFR 1926 Subpart P requires protective systems for excavations 5 feet or deeper where a person enters. Depending on the soil type classification (Type A, B, or C), you need sloped walls, a trench box, or shoring. Type C (wet, sandy, or disturbed soil) requires 1.5 horizontal to 1 vertical slopes. Never enter a deep pit without a competent person having evaluated the soil type and set up a protective system.
How do I record root presence in a soil horizon?
Record roots by abundance class and size class in each horizon. USDA convention uses very few (less than 1 per 10 cm²), few (1-5), common (5-20), and many (more than 20). Size classes run fine (less than 1 mm), medium (1-5 mm), and coarse (over 5 mm). Note the depth where roots go very few or absent. That depth is functionally your effective rooting depth for the site.
Can I use a soil probe instead of digging a full pit?
A soil probe is useful for fast lateral characterization between full pits, but it doesn't replace one. Probes compress and smear the sample, which makes texture assessment harder and structure impossible to evaluate. Probes also rarely reach past 48 inches and miss deeper restrictive layers. Use them to understand how the soil varies across a block and to pick representative spots for the full pit descriptions.
What lab analyses should I send out after a pit observation?
At minimum, send separate samples from each horizon for particle-size analysis (confirms your field texture estimate), pH, and electrical conductivity. For new sites, also run organic matter on the A horizon, available water capacity if you can, and cation exchange capacity. If the HCl test suggests carbonates, request a calcium carbonate equivalent. Turnaround from most commercial soil labs runs 1 to 3 weeks, costing roughly $30 to $100 per sample depending on the panel.
How does a soil profile pit record help with irrigation system design?
The profile hands your irrigation designer the data they actually need: water-holding capacity by texture, depth to any restrictive layer that creates a perched water table, and drainage class. A coarse sandy loam to 60 inches needs a different emitter flow rate and set frequency than a clay loam over a dense fragipan at 30 inches. Without pit data, design leans on surface observations and regional assumptions that are often wrong for the specific block.
How long does it take to complete a soil profile pit observation?
Excavation with a backhoe takes 15 to 30 minutes per pit. The observation and recording takes 45 to 90 minutes for an experienced person doing a thorough job, including Munsell color readings, ribbon tests, penetrometer readings, and photography. Backfilling adds another 15 to 30 minutes. Budget a full day for three to four pits, including travel between locations, setup, and clean notation of your field sheets.
What is soil structure and how do I describe it in a pit?
Soil structure is the arrangement of soil particles into aggregates called peds. You describe it with three attributes: grade (structureless, weak, moderate, strong), size (very fine to very coarse), and type (granular, platy, subangular blocky, angular blocky, prismatic, columnar, single grain, massive). Moderate subangular blocky structure in a B horizon is generally good for root penetration. Massive or platy structure often means compaction or restricted drainage.
Sources
- UC Agriculture and Natural Resources (UC Cooperative Extension): UC Cooperative Extension treats the soil profile pit as the most informative tool in pre-plant vineyard site assessment and follows USDA horizon description conventions
- Washington State University Extension, Viticulture and Enology: WSU Extension recommends a minimum 120 cm pit depth for vineyard site evaluation and notes that root penetration is significantly affected by restrictive layers and bulk density above 1.65 g/cm³
- OSHA, Excavations Standard 29 CFR 1926 Subpart P: OSHA 29 CFR 1926.652 requires protective systems for excavations 5 feet or deeper where a person enters, with slope requirements varying by soil type classification
- Cornell University College of Agriculture and Life Sciences: Cornell viticulture extension has published vineyard site evaluation worksheets following USDA horizon description structure
- UC Agriculture and Natural Resources, Grape Rootstock Information: Rootstock Fercal shows the highest lime tolerance in California trial data; 41B is also recommended for high-carbonate soils
- EPA Worker Protection Standard (WPS), 40 CFR Part 170: The EPA Worker Protection Standard requires that agricultural employers train field employees on WPS requirements before entry into pesticide-treated areas and that restricted-entry intervals be observed
- USDA NRCS Web Soil Survey: Web Soil Survey publishes NRCS soil mapping unit descriptions for most US agricultural soils that can be cross-referenced against field observations
- Soil Science Society of America, Glossary of Soil Science Terms: SSSA defines standard soil science terminology including structure grade, size, and type classifications used in horizon description
Last updated 2026-07-11